Learn More With Our

Blog

What Is an Electrical Plug Lockout and How Does It Work?

An electrical plug can look harmless once it is pulled from an outlet. Yet a worker may reconnect it while someone is cleaning, inspecting, or repairing the equipment. An Electrical Plug Lockout helps prevent that mistake by enclosing the plug and securing the enclosure with a lock. The plug stays visible, but its prongs remain inaccessible. Simple, but important.

Electrical safety specialist Jordan Lee puts the principle this way: “A lockout works only when the plug stays secured and the key stays with the person doing the work.” This is a practical reminder, not a substitute for checking the equipment’s energy sources or following site procedures. Some machines can retain stored energy after disconnection. That detail is easy to miss.

In practice, a worker disconnects the plug, checks that the equipment cannot operate, and fits a compatible lockout device over the plug. The worker then applies a personal lock and, where used, an identification tag. Size matters: the device must fit the plug and cable without forcing either into place. A poor fit can leave room for tampering or damage.

This guide explains what an Electrical Plug Lockout is, how its parts work, and where selection errors can occur. It also looks at the limits. A locked plug does not automatically control every energy source, and a tag alone does not physically prevent reconnection. The small details matter. A rushed check can undo a careful setup.
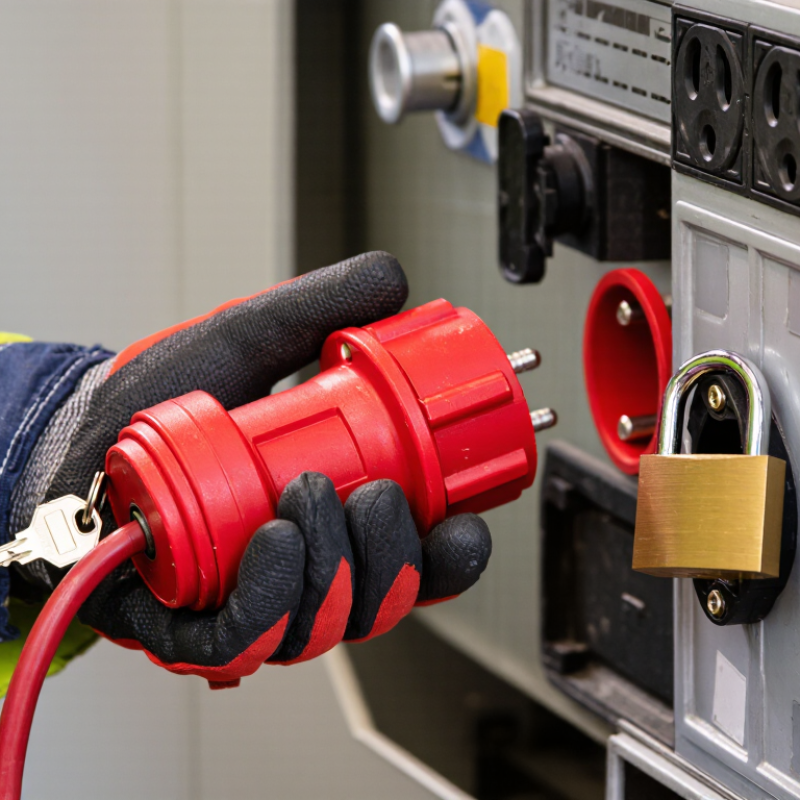
What Is an Electrical Plug Lockout and How Does It Work?

Definition and Purpose of an Electrical Plug Lockout

An electrical plug lockout is a safety device that encloses a plug and prevents it from being reconnected to a power source. The enclosure typically has a place for a personal padlock. Once fitted, it keeps the plug physically separated from the outlet and signals that equipment is being serviced. Its purpose is to control hazardous energy, not merely to warn coworkers. A tag alone cannot stop someone from plugging equipment back in.

For a practical example, a technician disconnects a machine, places its plug inside a lockout enclosure, and applies a uniquely keyed padlock. The technician then verifies that the machine cannot start before beginning work. OSHA’s Lockout/Tagout overview estimates that effective energy-control procedures prevent about 120 fatalities and 50,000 injuries each year in the United States. Those figures cover broader lockout/tagout practices, not plug lockouts alone. Fit matters: plugs vary in shape and size, and a poorly matched enclosure may not close securely. It is easy to overlook that detail. Workers should also check for other energy sources, such as batteries or stored pressure, because securing one plug does not isolate every hazard.

Main Components and Their Functions

An electrical plug lockout is a protective enclosure that fits over an unplugged device’s plug and prevents it from being inserted into an outlet. It helps keep equipment isolated during maintenance. The exact design varies, but most units rely on a few simple components working together. Details matter.

The main body is usually made from rigid, impact-resistant material. It surrounds the plug, leaving no easy grip for someone trying to pull it out. An entry opening lets the plug and cable pass through; its shape must match the plug closely enough to limit access without pinching the cord. A hinged or split cover opens for installation, then closes around the plug. If the cover does not seat fully, the lockout may be less effective.

A built-in locking point accepts a personal padlock, holding the cover shut until the authorized worker removes it. Some designs include space for more than one lock, so each worker can maintain individual control. The cable exit should allow the cord to bend naturally. Check for cracks, a secure fit, and clear identification before use. One detail is easy to miss: a plug lockout only works when the equipment is unplugged and the device fits the enclosure. It does not control other energy sources.

How a Plug Lockout Prevents Reconnection

An electrical plug lockout is a protective enclosure that holds a plug in a locked position. It prevents the plug from entering an electrical socket during maintenance. The device usually surrounds the plug body and includes a hole for a personal lock and warning tag.

How a Plug Lockout Prevents Reconnection

A qualified worker first switches off the equipment and unplugs it from the power source. The plug then goes inside the lockout enclosure. After closing the cover, the worker attaches a personal padlock and identification tag. The enclosure blocks access to the plug blades, so another person cannot reconnect the equipment by accident.

Verification still matters. The worker should check the equipment for stored energy and confirm that it cannot start. A suitable test instrument may help verify the absence of voltage, but only trained personnel should perform electrical testing. The lockout is not a replacement for isolation procedures.

Keep the key under personal control.

In real workplaces, rushed tasks create risk. Someone may assume an unplugged machine is safe and remove the lockout without checking the worker. Clear tags, direct communication, and a visual inspection reduce that mistake. However, no lockout device is foolproof. Its effectiveness depends on correct selection, proper fitting, and disciplined use. Workers should inspect the enclosure for cracks, wear, or loose closure points before each application. A damaged device may not provide reliable protection.

How a Plug Lockout Prevents Reconnection

A plug lockout encloses an unplugged electrical plug and can be secured with a padlock. While locked in place, it prevents the plug from being reinserted into an outlet. The chart shows these functional states, not measured test results.

Steps for Applying and Removing a Plug Lockout

Applying a plug lockout starts with identifying the equipment and the correct energy source. Follow the site’s isolation procedure, switch off the equipment, and unplug it by holding the plug, not the cord. Verify that the machine cannot start, using the approved test method. A dark indicator alone is not proof.

Inspect the plug and lockout device for cracks, dirt, or a poor fit. Place the unplugged plug inside the enclosure, close it fully, and attach a personal lock and clear identification tag. Check that the plug cannot be removed and that nobody can reconnect it. It is easy to rush this check when a job seems routine. That is exactly when small details get missed. If the device does not fit securely, stop and find a suitable one.

Remove the lockout only when the work is complete, tools are clear, and guards are back in place. Each worker should remove their own lock under the site procedure. Notify affected people before restoring power. Then remove the device, reconnect the plug, and restart the equipment as directed. Stay clear during startup. A plug lockout controls reconnection; it does not confirm that every hazardous energy source is safe.

What Is an Electrical Plug Lockout and How Does It Work? — Steps for Applying and Removing a Plug Lockout

Stage Step Action Safety check
Before applying 1. Identify the equipment and energy source Use the equipment’s procedure to identify the correct plug and any other energy sources that must be controlled. Do not assume unplugging controls stored energy or other connected sources.
Applying 2. Shut down the equipment Follow the normal shutdown procedure before disconnecting power. Make sure the equipment has stopped and the area is ready for isolation.
Applying 3. Disconnect the plug Unplug the equipment using the approved method. Hold the plug, not the cord, when disconnecting it. Inspect the plug and cord; do not use damaged electrical equipment.
Applying 4. Enclose the plug Place the disconnected plug inside a plug lockout device that is designed to fit it, then close and secure the device. Confirm the enclosure cannot be opened or the plug removed without removing the lockout device.
Applying 5. Add a personal lock and tag Each authorized worker applies their personal lock and identification tag as required by the site’s lockout/tagout procedure. The lockout must prevent reconnection, and the tag should identify the person responsible for the lock.
Verifying isolation 6. Confirm the equipment is safe to work on Follow the equipment-specific procedure to verify isolation and address stored energy before beginning work. A plug lockout prevents access to the plug; it does not by itself verify that all hazardous energy has been controlled.
Removing 7. Prepare for return to service Finish the work, reinstall guards, clear tools, and make sure people are safely positioned. Notify affected workers and follow the site’s return-to-service procedure.
Removing 8. Remove personal locks and the device Each worker removes their own lock and tag in accordance with the established procedure. Then open the plug lockout and remove it. Never remove another worker’s lock except under a formal, authorized procedure.
Restoring power 9. Reconnect and restart as authorized Reconnect the plug and restart the equipment only after confirming the area is clear and the procedure permits it. Stop if the plug, outlet, cord, or equipment appears damaged or unsafe.

A plug lockout is a device that encloses a disconnected electrical plug so it cannot be reinserted into an outlet while work is underway. Use it as part of the applicable workplace lockout/tagout procedure; it does not replace required training, isolation steps, or verification.

Key Safety Checks Before and After Use

Before using an electrical plug lockout, identify the equipment and confirm the correct energy source. Read the equipment procedure, then tell affected workers about the planned isolation. Stop the machine using its normal control. Unplug it by holding the plug, not pulling the cord. Check the plug, cord, and lockout device for cracks, bent pins, exposed wiring, or a loose fit. Damaged parts need attention before work begins. No shortcuts here.

Fit the device over the unplugged plug and attach your personal lock and identification tag. Check that the enclosure closes fully and the plug cannot be removed. Keep the cord visible and protected from damage. If the plug does not fit securely, stop and use an approved alternative isolation method. A quick tug can reveal a poor fit, but it does not prove that equipment is de-energized. Verify isolation with the equipment’s specified test method, performed by a qualified person.

After work, account for tools, guards, and personnel before removing the lockout. Each worker should remove their own lock, following the site procedure. Inspect the plug and device again for wear or damage. Notify affected workers before restoring power, then reconnect the plug and test the equipment safely. It is easy to rush this stage. That is worth remembering.

Top